Turn on the Add to calendar button
You turn on the Add to calendar button with the Enable calendar tick box. It takes the date and location from the same window, so check those first.
Switching the button on
- In your dashboard, click the menu (the three dots) next to the name of your invitation.
- Choose Change details.
- Check the Date and Location.
- Tick Enable calendar and click Save settings.
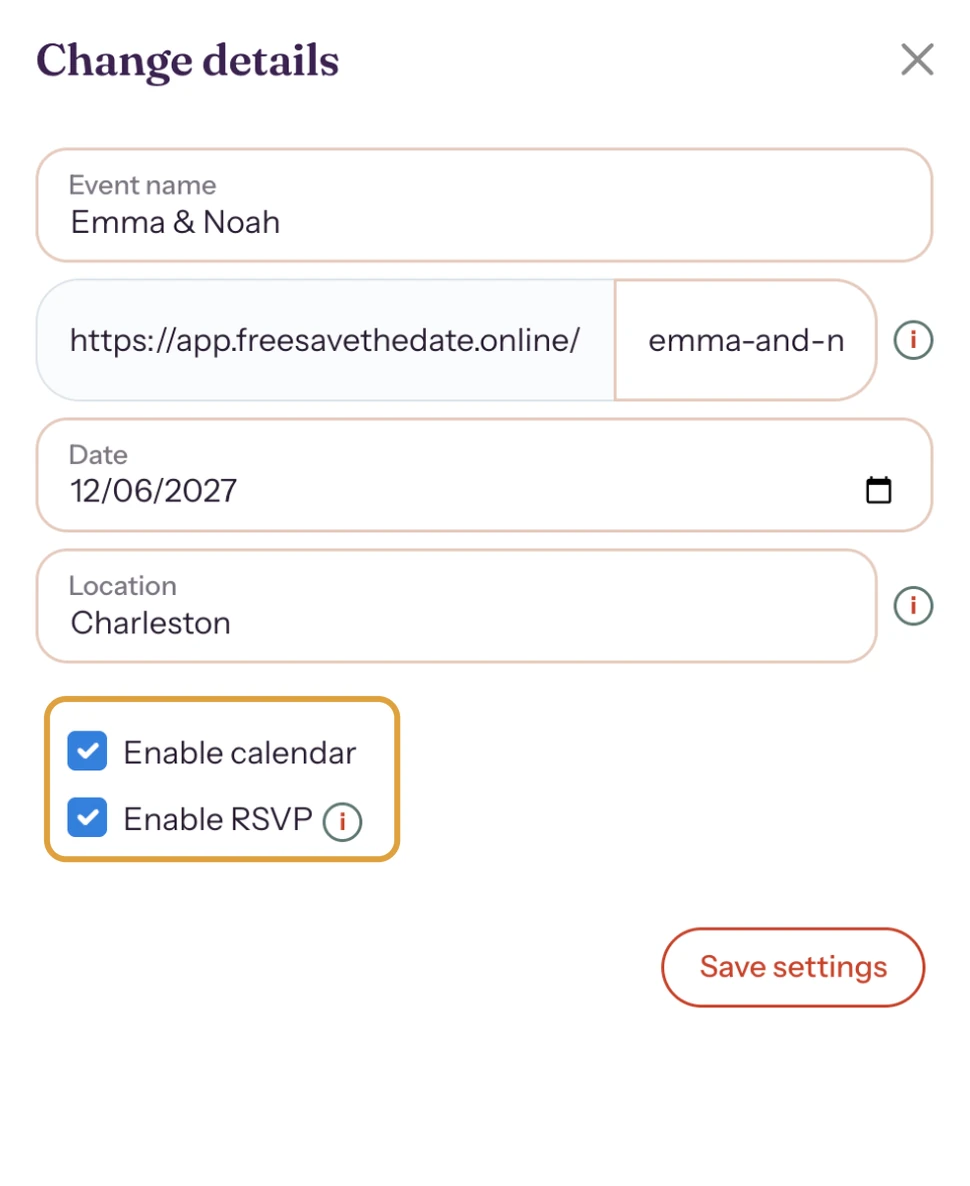
On a new invitation the button is already on. You can turn it off at any time, even after you’ve shared the link.
What your guests get in their calendar
- The Event name as the title. Pick something guests will recognise, such as “Elizabeth & James’s wedding”.
- The date, as an all-day event.
- The name and address of the venue.
- A link to your invitation in the notes.
Next step: How guests add the date to their calendar
Last updated: October 24, 2026