Your dashboard at a glance
Your dashboard lists all your invitations, newest first. From here you edit them, share them and see the replies.
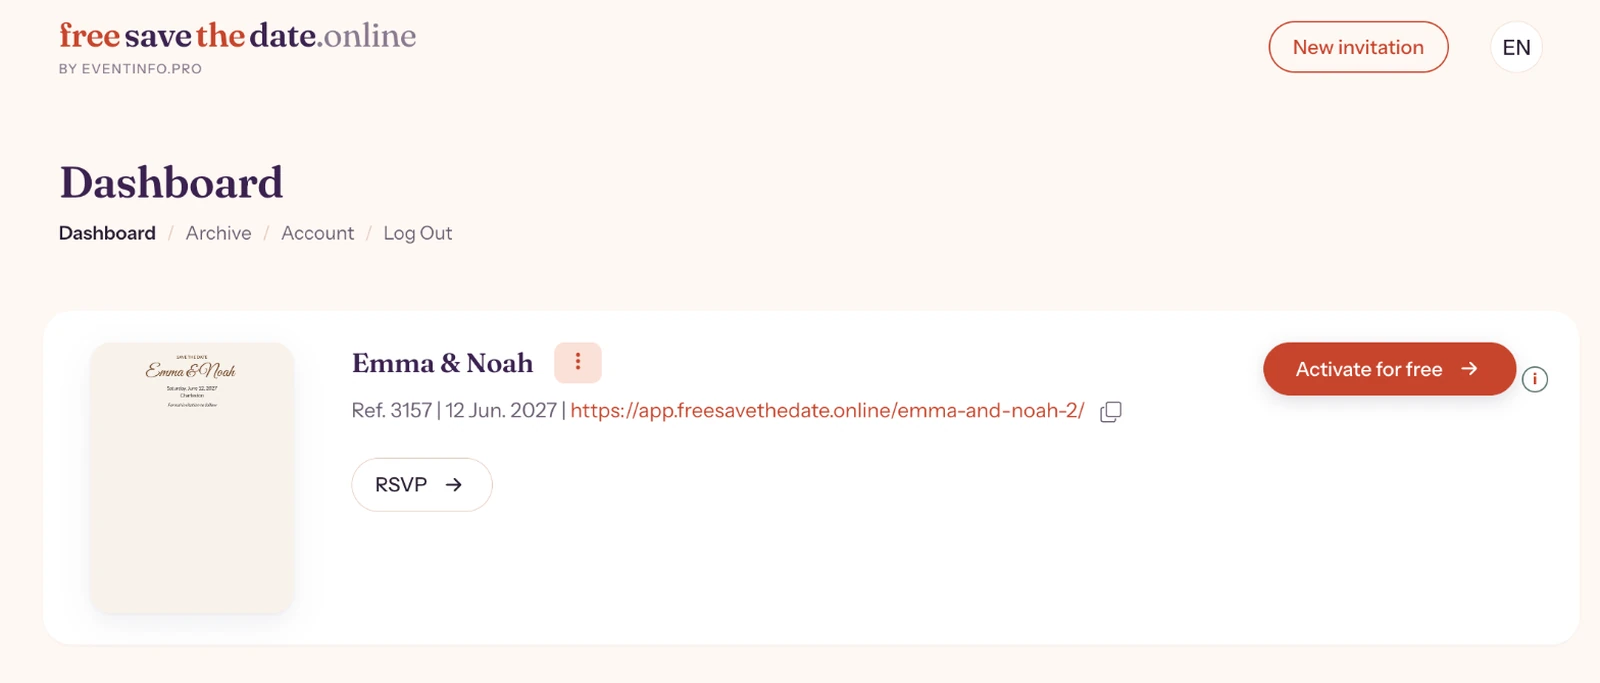
For each invitation
- The name, with the menu (three dots) next to it.
- Ref. followed by a number. Quote that number if you contact us about this invitation.
- The event date and the link to your invitation, with a small icon to copy it.
- On the right, Activate for free. Once the save the date is activated, the button disappears.
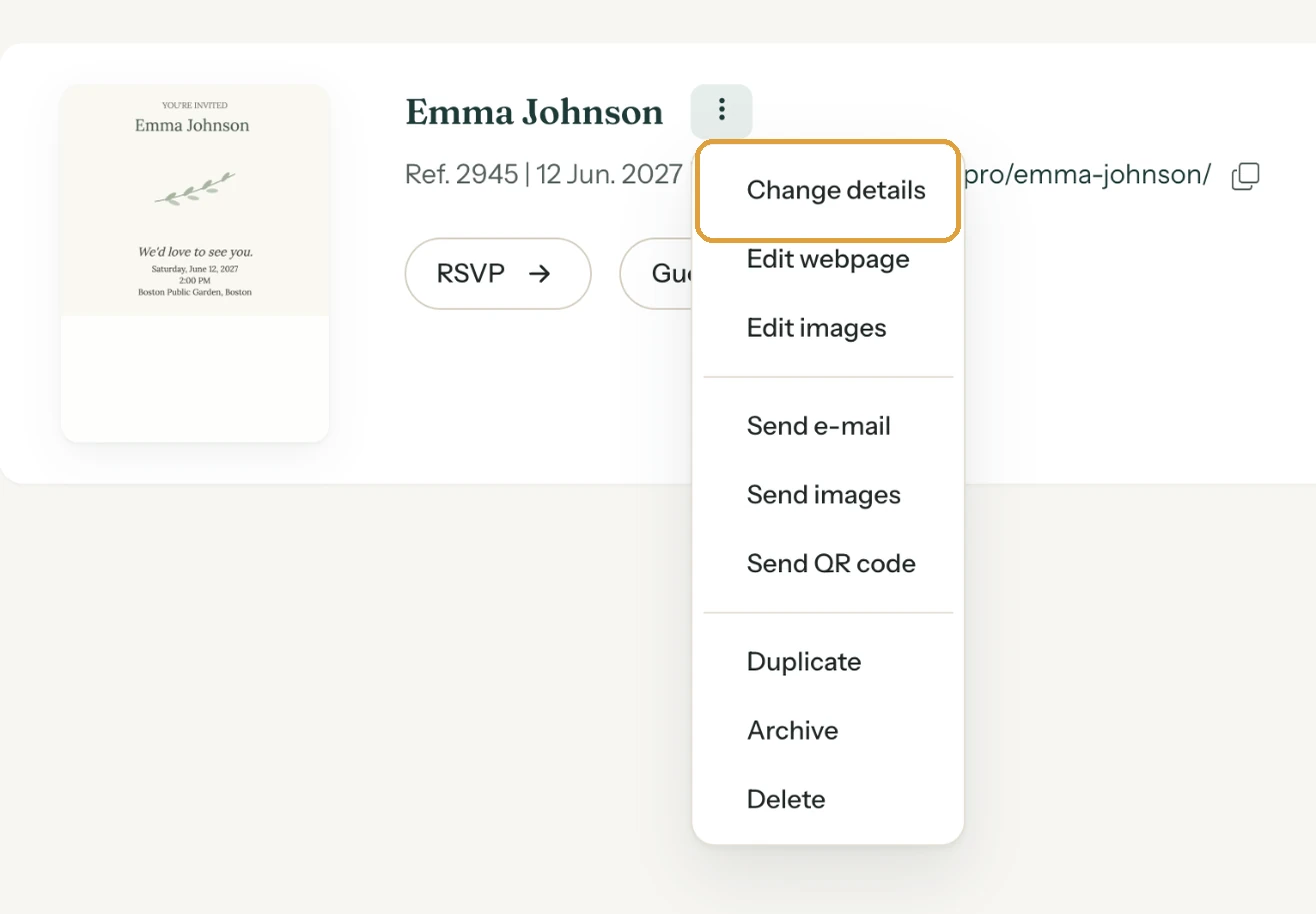
The menu behind the three dots
Change details, Edit webpage and Edit images are for making changes. Send e-mail, Send images and Send QR code help you share. At the bottom are Duplicate, Archive and Delete. The image options only appear once those images have been created. Share overview creates a private link to the RSVPs and guestbook, for anyone you want to keep in the loop (Let others view RSVPs with a private link).
The other pages
The navigation has Archive and Account. To make a new save the date, click New invitation at the top right. You see the replies with the RSVP button next to your save the date. Log Out signs you out.
Next step: Updating your event settings
Last updated: November 11, 2026
- Your dashboard at a glance
- Updating your event settings
- Duplicating an invitation
- Forgot your password or can't log in
- Archive or delete
- Changing your account details and password
- Deleting your account
- Newsletter and notifications
- Which e-mails do you get from Freesavethedate.online?
- E-mail saying your password or e-mail address changed