Create your first invitation
You don’t need any design experience. You start from an example and replace whatever doesn’t fit. You can stop at any point and carry on later: your invitation simply waits on your dashboard.
1. Choose a design
On your dashboard, click New invitation at the top right. You now see all the designs. Click the one you like. Prefer a simple starting point that you fill in yourself? Choose Start (almost) from scratch, the first tile with the plus sign. Looking for something in particular? Type a word in the search box, like gold or flowers, or pick a label under Refine (Searching and filtering designs).
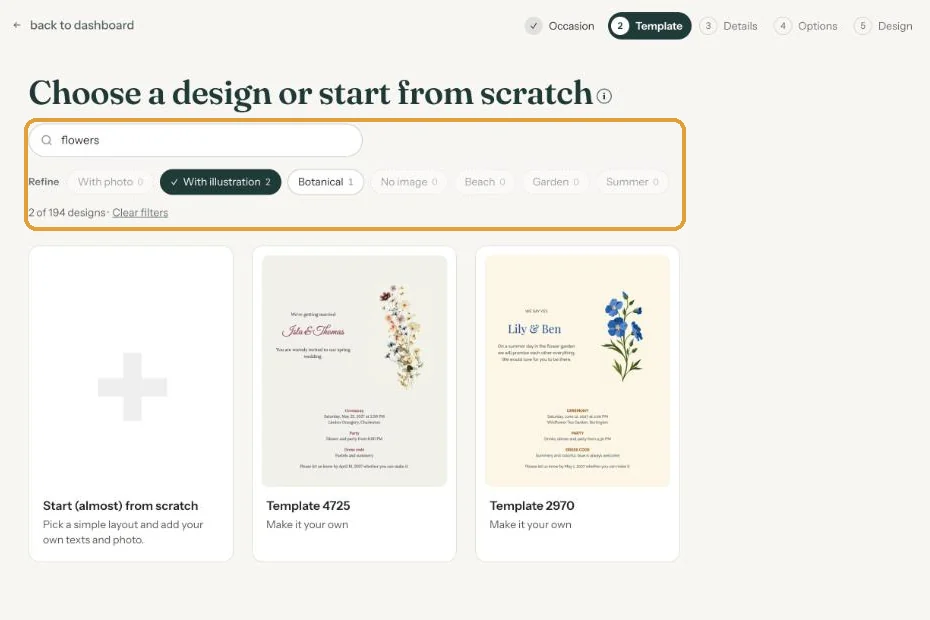
The difference is explained in Ready-made design or start from scratch?.
2. Fill in the details
Enter the name (for a wedding, the couple’s names), the date and the location (a save the date has no time). The web address of your invitation is suggested from the name. You can change it: use letters, numbers and hyphens.
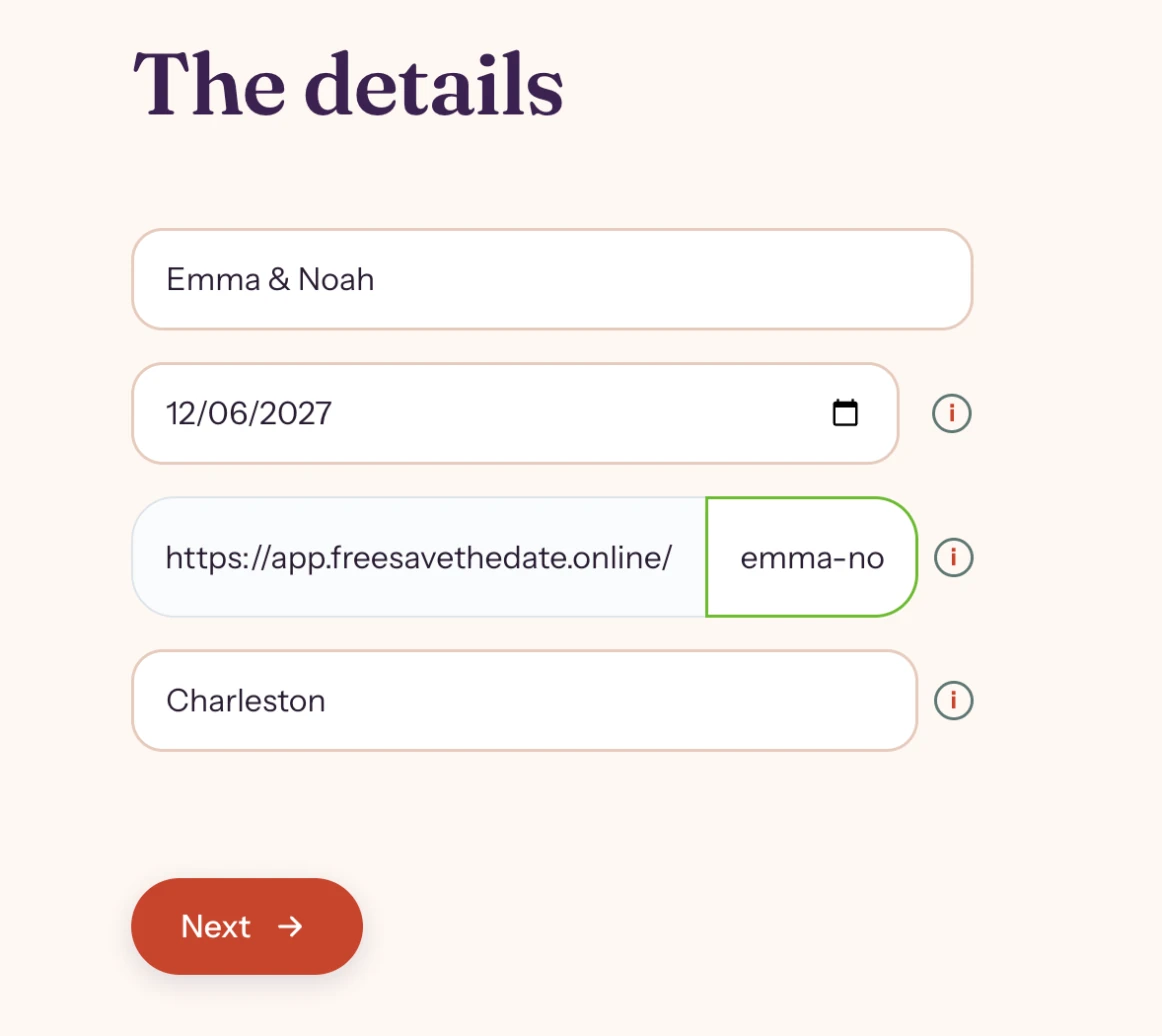
3. Finish the design
You are now in the builder. Name and date are already on the card, but part of the sample text still belongs to the design. That is why you see the message Read the text carefully at the top.
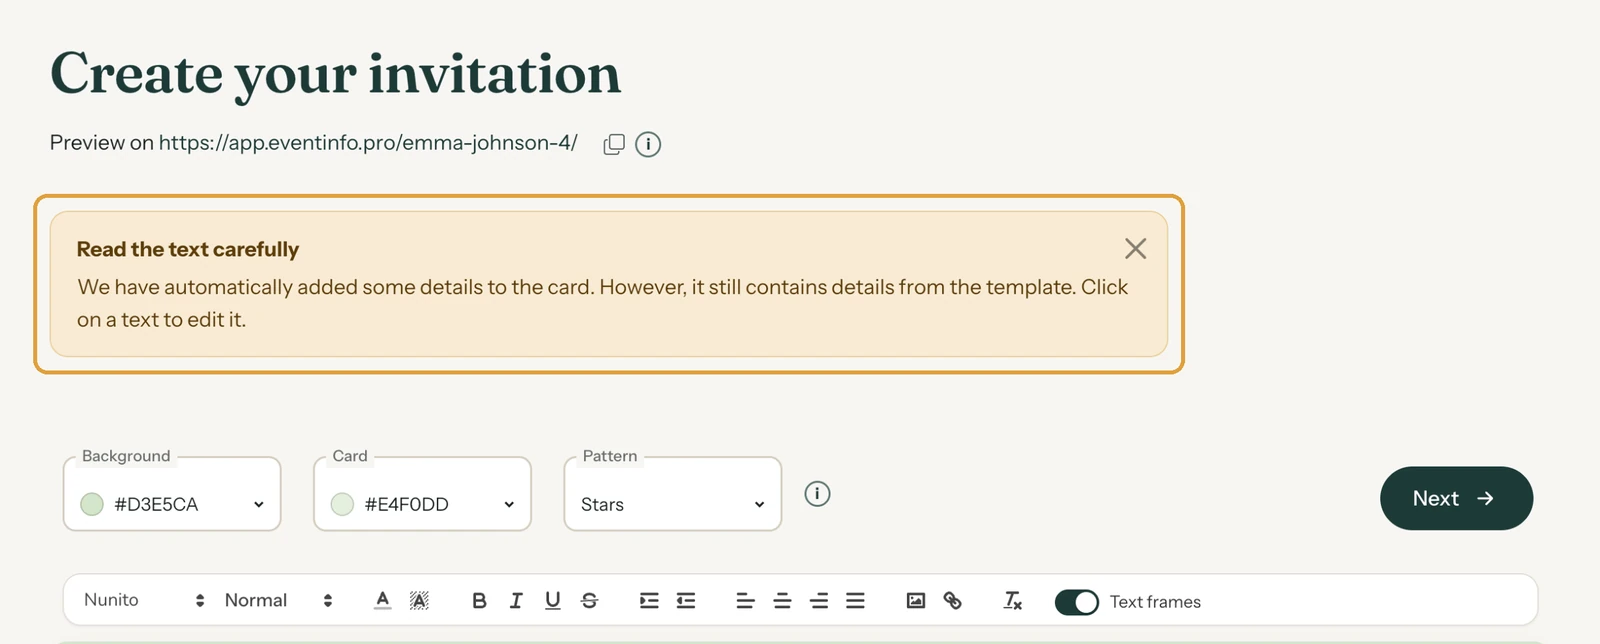
- Click a text to change it.
- Click the sample photo to put in your own.
- Colours and pattern are set with the fields above the card.
4. Save and share
Click Next. Freesavethedate.online then creates images for social media and apps like WhatsApp, which takes a few seconds. After that you see All saved, with the link to your invitation. The first time, the designed email with your invitation also arrives in your inbox automatically.
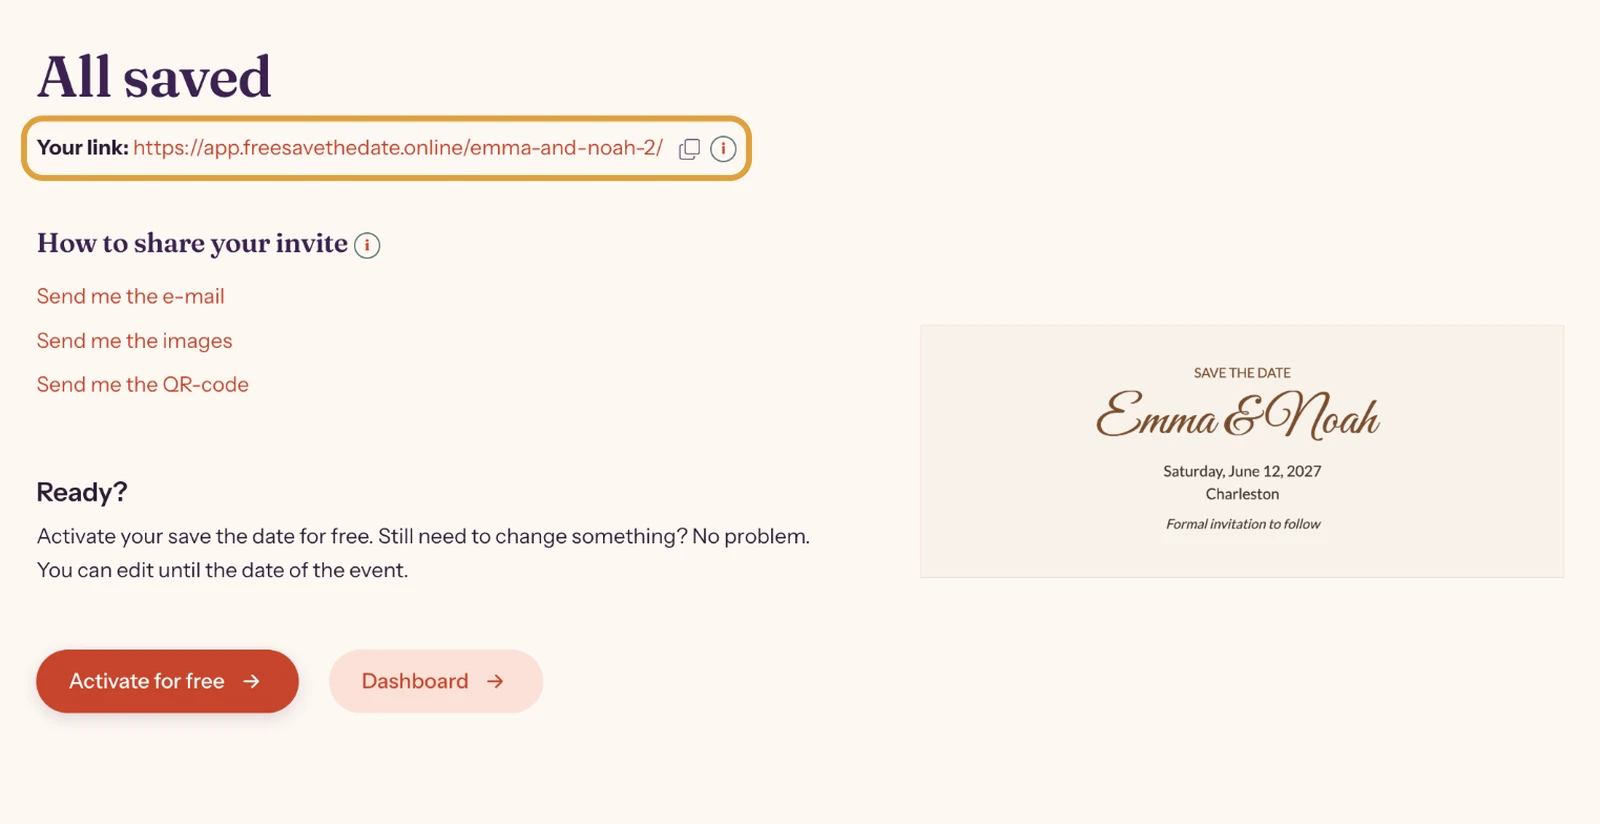
You can activate for free now, or take your time and look first. Changes are possible until the date of the event.
Next step: See your invitation the way your guests do
Last updated: November 11, 2026